
How to Make a Utility Kilt – A Comprehensive DIY Tutorial

Choosing the Right Kilt Pattern
Selecting the appropriate kilt pattern is one of the most critical steps in making a kilt utility. A well-chosen pattern serves as a blueprint for your project, guiding you through each phase of the construction process.
Understanding and Using Kilt Patterns
When selecting a kilt pattern, consider the design and complexity. Traditional patterns often include detailed instructions on pleating, waistband construction, and fabric cutting. For utility kilts, look for patterns incorporating modern elements like pockets and belt loops. If you're new to sewing, start with a simpler pattern to build your skills before tackling more complex designs.
Custom Kilts and Pattern Adjustments
For those who want a truly personalized garment, consider adjusting to a standard pattern or even drafting your own. Custom kilts allow you to modify the design according to your measurements, preferences, and the specific features you want to include, such as an adjustable waistband or unique pleating styles. Adjusting the pattern for your body type ensures a perfect fit and makes your kilt unique.

Step-by-Step Kilt Sewing Instructions
Now that your materials, tools, and patterns are ready, it's time to start sewing your utility kilt. This section will walk you through the essential steps of kilt construction, ensuring that each component is assembled precisely and carefully.
Preparing Your Workspace
Before you begin, set up a clean, well-organized workspace. Ensure you have enough room to lay out your fabric, pattern pieces, and tools. Adequate lighting is also important, especially when working with dark fabrics or intricate pleats. A spacious and organized workspace helps prevent mistakes and allows you to focus on the details of your project.
Cutting the Fabric: A Beginner's Guide
Accurate fabric cutting is crucial for a well-made kilt. Start by laying out your fabric flat, ensuring the grain is straight, and there are no wrinkles. Using your sewing pattern as a guide, mark the fabric with chalk or fabric markers. Pay special attention to the fabric grain direction, as this will influence how the kilt hangs and how the pleats fall.
Once your fabric is marked, use sharp scissors or a rotary cutter to make precise cuts. Clean edges are essential, especially for areas that will be pleated or hemmed. Taking your time with fabric cutting will make the subsequent steps, such as pleating and sewing, much easier and more accurate.
Essential Sewing Techniques for Kilts
Sewing a kilt requires a few specialized techniques, particularly when constructing the waistband, pleats, and hem.
- Sewing the Waistband: The waistband is a crucial component that supports the weight of the kilt and provides a finished edge. When attaching the waistband, ensure that it aligns perfectly with the wrinkles. Reinforce the waistband with interfacing for added strength and durability. Pay attention to the positioning of belt loops and fastenings, as these will affect the overall fit and functionality of the kilt.
- Attaching Belt Loops and Fastenings: Belt loops should be evenly spaced along the waistband and securely stitched to handle the strain of a belt. Choose kilt fastenings that are secure and easy to use, such as buckles or an adjustable waistband. This step is crucial for ensuring your kilt stays in place and remains comfortable throughout wear.
Pleating Techniques for a Utility Kilt
Pleats are the defining feature of any kilt, giving it its distinctive look and allowing for freedom of movement. Mastering pleating techniques is essential for creating a high-quality utility kilt.
Overview of Kilt Pleating Techniques
Two main types of wrinkles are commonly used in kilts: box and knife. Box pleats create a wider, more structured fold, making them ideal for kilts that require more volume and a traditional look. Knife pleats, however, are narrower and overlap each other, offering a sleeker, more modern appearance. The choice between box and knife pleats depends on your utility kilt's aesthetic and functional requirements.
Step-by-Step Guide to Pleating Your Kilt
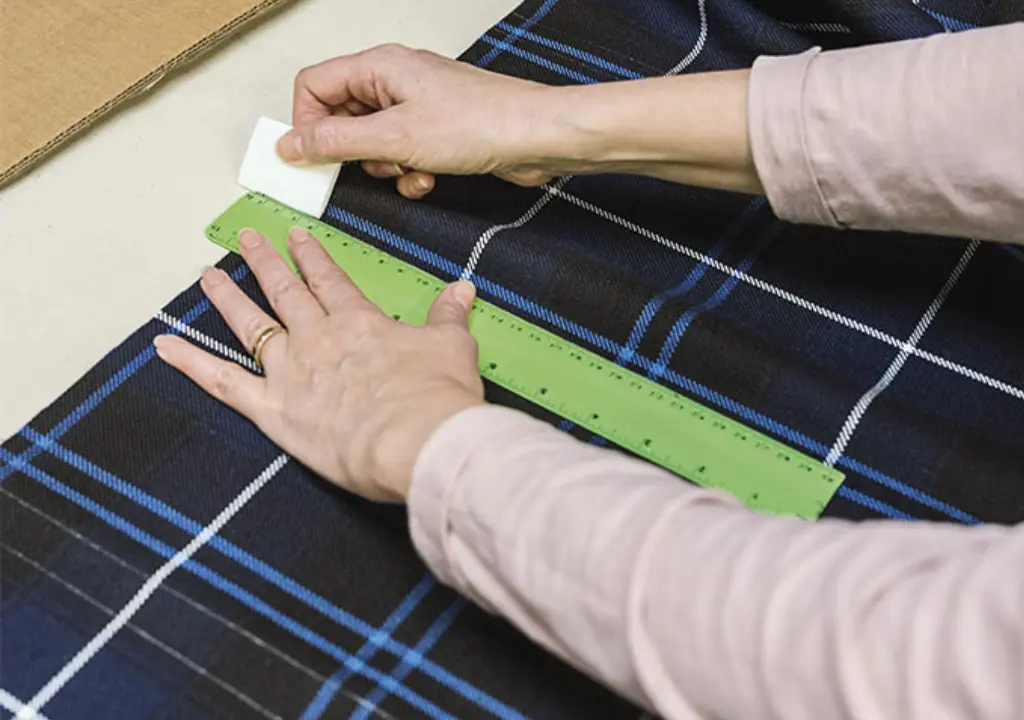
- Marking the Pleats: Begin by marking the positions of the wrinkles on your fabric. Use a ruler and fabric chalk to ensure that each pleat is of uniform size and evenly spaced. Accurate marking is critical to achieving a balanced and symmetrical pleat arrangement.
- Folding the Pleats: Carefully fold the fabric along the marked lines, ensuring that each pleat is sharp and precise. Pin the pleats in place as you go to prevent them from shifting.
- Sewing the Pleats: Once they are pinned, sew them down, ensuring the stitching is even and secure. This step anchors the pleats to the kilt and ensures they stay in place during wear.
Pressing Techniques
Pressing is a crucial step that sets the wrinkles and gives the kilt its final, polished look. Use a steam iron and pressing cloth to carefully press each crease, starting from the top and working your way down. Pressing techniques ensure the pleats are crisp and well-defined, which is especially important for maintaining the kilt's structure. Regular ironing of the pleats between wears can help maintain their sharpness and extend the life of your kilt.
Assembling the Kilt
With the pleats in place, it's time to assemble the rest of the kilt. This process combines all the elements, from the pleats to the waistband, into a cohesive garment.
Attaching Pleats to the Waistband
Begin by aligning the pleats with the waistband, ensuring they are evenly spaced and correctly positioned. Sew the pleats to the waistband with a strong stitch, reinforcing areas that will experience the most strain, such as the sides and the top. This step is crucial for creating a kilt that is both comfortable and durable.
Adding Belt Loops and Fastenings
Attach the belt loops to the waistband, ensuring they are evenly spaced and securely sewn. Next, add the fastenings according to your pattern's instructions, ensuring they are positioned for easy access and comfort. If your kilt includes an adjustable waistband, test the fit at this stage to ensure it can be comfortably adjusted to the desired size.
Tips for Ensuring Durability
Use durable threads and strong stitching techniques to ensure that your kilt stands the test of time—double-stitch areas with the most weight or movement, such as the waistband and pleats. Regular maintenance, such as checking the seams and stitching for wear, will help keep your kilt in excellent condition.
Final Touches and Finishing
The final touches elevate your kilt from a basic garment to a polished, professional piece.
Hemming the Kilt
A well-hemmed kilt not only looks professional but also prevents fraying. Follow your pattern's guidelines for hemming, ensuring that the hemline is even all around. Use a strong stitch to secure the hem and finish with a press to create a clean edge.
Adding Pockets and Custom Features
One of the benefits of a utility kilt is the addition of modern features like pockets. If your pattern includes pockets, sew them on, ensuring they are symmetrical and securely attached. You can also add other custom features like extra belt loops or decorative stitching to personalize your kilt further.
Pressing and Final Adjustments
Give your kilt a final press, focusing on the pleats, waistband, and hem. Make any last-minute adjustments to the fit, such as tightening the waistband or adjusting the placement of the kilt accessories. This final press will give your kilt a sharp, finished appearance, ready to wear.
Attaching Kilt Accessories
To complete your kilt, add accessories like sporrans, kilt pins, and buckles. These elements enhance the kilt's functionality and traditional aesthetic. Ensure that all accessories are securely attached and positioned correctly.

Maintenance and Care for Your Utility Kilt
Proper care and maintenance are essential for keeping your utility kilt looking its best over time. With the right care, your kilt can remain a durable and stylish garment for many years.
Best Practices for Washing and Storing a Kilt
The care instructions for your kilt will depend on the fabric you've chosen. For traditional wool kilts, dry cleaning is recommended to preserve the fabric and structure. You can usually machine wash kilts made from more modern materials like cotton or polyester on a gentle cycle. When storing your kilt, hang it up to maintain the pleats and prevent wrinkles. Proper storage will help maintain the kilt's shape and extend its lifespan.
Repairing Common Kilt Issues
Over time, your kilt may experience wear and tear, such as loose pleats, frayed edges, or worn belt loops. Regularly inspect your kilt for any signs of damage and address them promptly. Simple repairs, such as re-stitching loose areas or reinforcing seams, can prolong the life of your kilt and keep it looking as good as new.
Conclusion
Creating a traditional kilt is a journey that blends tradition with modern practicality. Through careful selection of materials, mastering essential sewing techniques, and meticulous attention to detail, you can craft a not only functional but also deeply personal garment. Each pleat, stitch, and accessory contributes to the kilt's overall character, reflecting both heritage and individual style.
Whether you're a seasoned sewer or new to DIY projects, making your utility kilt is an immensely rewarding experience. This project allows you to connect with Scotland's rich history while also creating something uniquely yours. By following this comprehensive guide, you'll have all the knowledge and tools needed to create a kilt that can be worn with pride for years.